Fix Errors and Set up DVWA on Windows 7

DVWA is for infoSec Enthusiast like us, where you can test your tools and applications in safer and of course legal way.
For setting up DVWA, download XAMP and DVWA .

Note : It is recommended that you set  it up and test it in Virtual Environment which is completely isolated (by selecting Host-only network).

1. Download and Install XAMP on your machine. Once installed, start “MySQL” and “Apache” services.

1

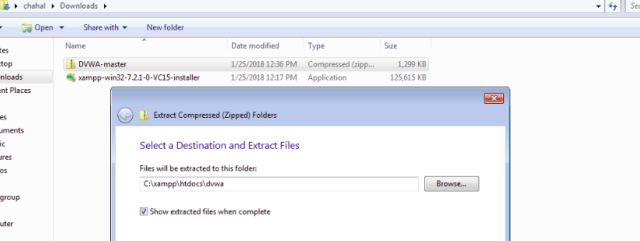
2. Now Download the DVWA from here and Extract the dvwa folder to this location C:\xampp\htdocs\dvwa

2


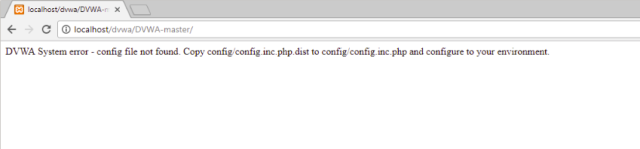
Once done, go to your browser and enter localhost/dvwa
In my case, I got the following error which is quite descriptive in itself. If you get it too, follow the steps below to resolve it.

Error: dvwa system error – config file not found. copy config/config.inc.php.dist to config/config.inc.php and configure to your environment.

3

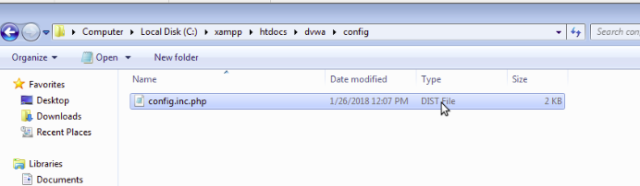
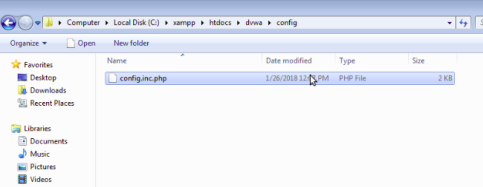
Go to the folder C:\xampp\htdocs\dvwa\config and rename the file to .php extension. In my case, after renaming the file, extension remained the same.

4


So, to display the file extensions , Go to “Folder Options”.
For viewing this option, go to Start Menu, type “Folder Option” and then click to open it. Select the “View” option on the top of the tap. In the Window, uncheck the box “Hide extensions for known file types” and then click OK.

5

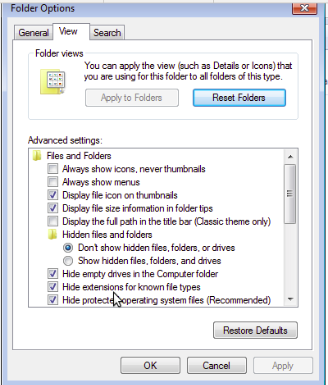
Now, you should be able to see the extension and rename the file to change its extension to php.
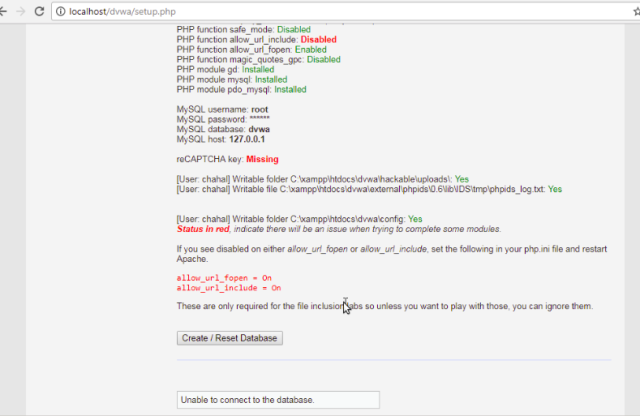
6

 MySql Error:

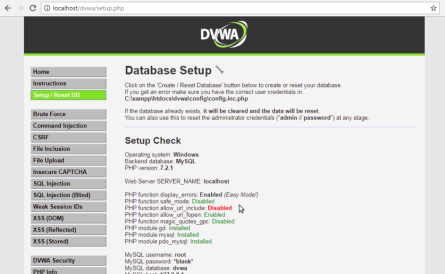
Now, in the browser, if you are seeing DVWA setup page, and if you click “Create/Reset Database”, it fails because php cannot connect to MySql Database.

7

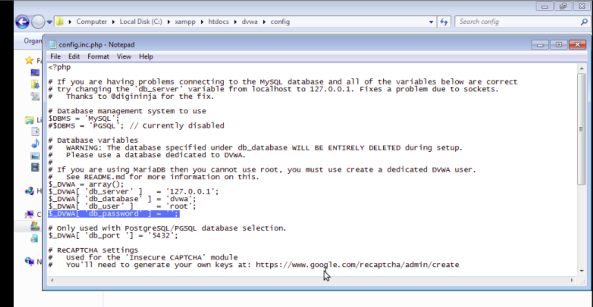
To resovle the error, open the config file with notepad and change the default password and leave it blank and save the file.

8

Returning to the broser, click “Create/Reset Database” and you would see everything seems to be alright this time.


Enable Allow URL:

Once you are logged in DVWA, you will find that “allow_url” is not enabled.

11

To enable it, go to XAMP -> Apache. Right Click “Configure” and click
“PHP”.

12

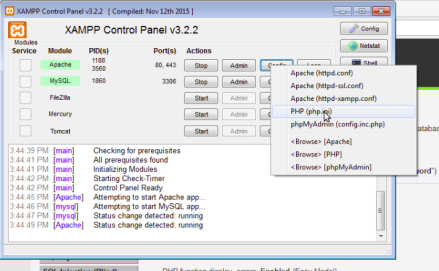
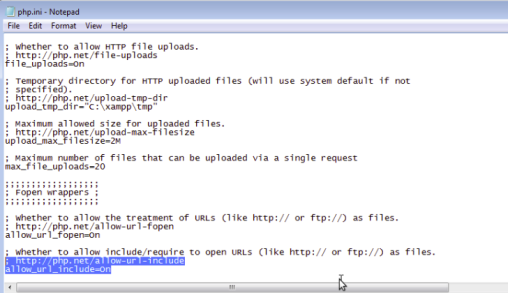
Find “allow_url_include” and make it ON. Save the file. This must resolve the error.

13

Happy Hacking 🙂


Group policy precedence and inheritance in Active Directory

Applying group policies on users makes our task easier. There is the order of how these policies get applied on a user. Group policies on OU (organizational units) have more precedence than domain GPOs which have higher priority than site GPOs and Local GPOs.Policies are applied in

Policies are applied in following order:

  1.   Local GPOs
  2.   Site GPOs
  3.   Domain GPOs
  4.   OU GPOs
  5.   Enforced GPOs

When new GPO is applied, it overrides the previous one. So, the last one has highest precedence and first one has least. To make it clearer, I’ll explain it with an example.

1 . In the picture below, you can see my Group policy management console, where my site is my Forest and my domain is college.local. In my domain, I have one OU as “nocontrolpannelaccess”. and I have linked it to “nocontrolpannelacessGPO”. I have edited nocontrolpannelaccessGPO in such a way that it will prohibit users to access control panel and other GPO “controlpannelaccess” allows users to use control panel.

This GPO for the OU overrides other GPOs linked to Domain (Default Domain Policy and controlpannelaccess). Thus, the users in OU “nocontrolpannelacessGPO” will not be able to access control panel.

gpo1

2. If you block inheritance on any OU, then any group policy above this OU doesn’t get applied. As you can see, the container “nocontrolpannelaccess” just has now only one policy on it.

gpo3

3. If on the other hand, I enforce “controlpannelaccess” policy on domain, then no matter what policy is applied on any OU, enforced policy (controlpannelaccess) will have more precedence. So even users in “nocontrolpannelaccess” OU will now be able to access their control panel.

gpo2

Upgrade Cisco Router IOS via TFTP Server

Upgrading IOS in routers is quite easy. For this, we need to install TFTP server. There are many free TFTP servers available on the internet and you can download one from http://tftpd32.jounin.net/   Before doing the upgrade, make sure that you either have backed up your IOS image or you have a newer one.

  • Okay, now first things first. Disable other networks and set up a static IP address on your computer on which TFTP server is installed. I am giving my computer a static IP address of 192.168.1.1 with subnet mask 255.255.255.0
  • Open your TFTP server, browse it to the folder where your IOS image is kept.

11

  • Now, open your hyper terminal. Before upgrading the IOS, make sure that you have deleted the older one by typing the command:
    Router# delete flash:

delete-flash

It will then ask you for the file name, type  correctly the name of your file. You can look for the file name with command “show version”.

  • Now type in the following commands in rommon mode: (make sure you connected a cable to your g0/0 port of your router.)
IP_ADDRESS=192.168.1.2

IP_SUBNET_MASK=255.255.255.0

DEFAULT_GATEWAY=192.168.1.1

TFTP_SERVER=192.168.1.1

TFTP_FILE=c1841-ipbase-mz.124-3i.bin

Tftpdnld

Type ‘yes’ when it asks if you want to continue and then type reset to restart.

So  you just upgraded your IOS. Enjoy!